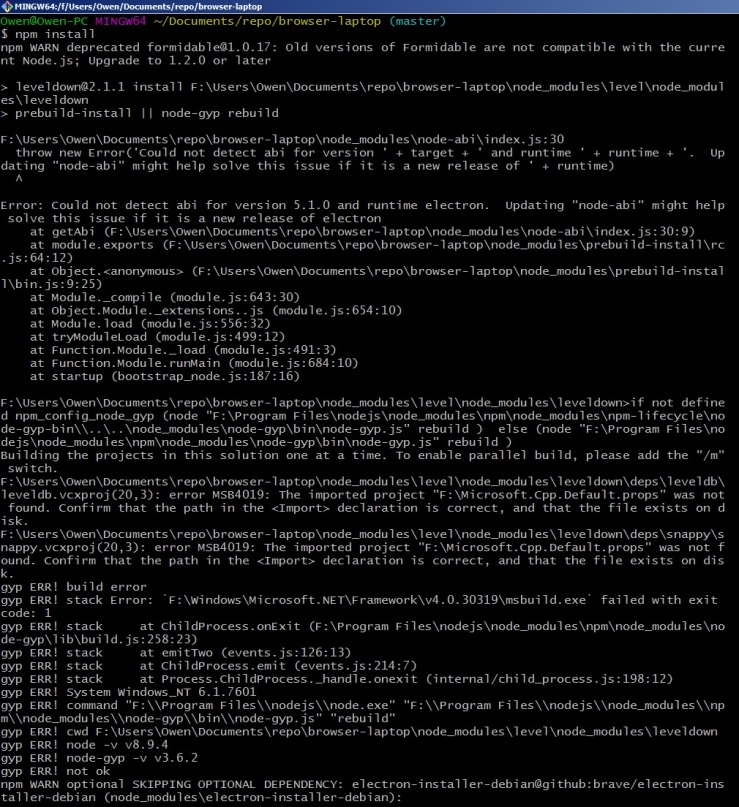
For the final release, I wanted to work on multiple small issues on a project I had some familiarity. I wanted to try to do more issues this time and apply the knowledge I have learned throughout this semester. From the topics we touched on in class, such as TravisCI, the bridge-troll project, to opening PDFs in Brave browser, I wanted to use the things I learned and contribute that way. This was why I wanted to work on projects I had some experiences with. The first project I chose was the Brave-laptop which I had built and worked on during previous labs.
Issue 1:
The first issues I searched for were from the url bar labels, and I found the following to be of interest. The issue was that ‘foo.b’ were causing brave to go to http://foo.b/ instead of performing a search for ‘foo.b’ like the other browsers. I thought I would have a good handle on this issue, because of my experience in handling url query with ‘dog cat’ and ‘http://www.google.ca?q=dog cat’ from the previous lab. I knew that if I fiddled with the urlutil.js file and its regular expression for awhile, I would be able to fix this issue. However, as I dove deeper into the comments from the conversation between the reporter and the contributors of the community, I realized the issue was more in depth than it first appeared. The issue lied in the autocomplete function of the url address bar rather than how the url was processed. Specifically, they wanted ‘github.c’ to autocomplete to ‘github.com’, from the references in this conversation. It appeared that the person who reported the issue was working directly with the owner of the project already, and so I continued my search for other issues.
Issue 2:
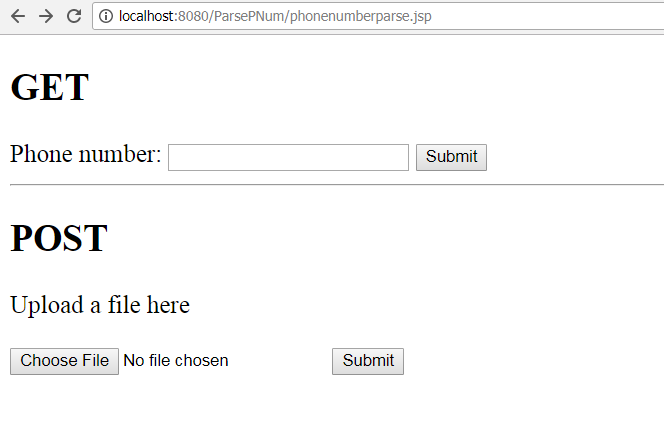
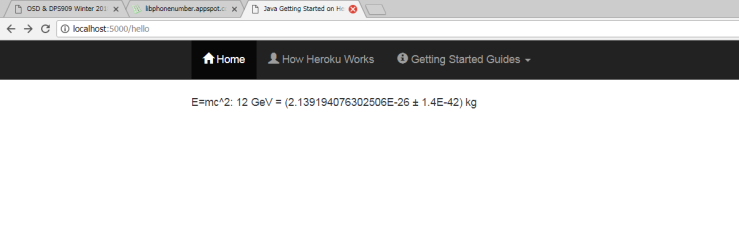
The second issue I explored involved opening pdf files in the brave browser. The bug in this issue was opening PDFs file locally would result in a blank pdf being opened. The first step is to download a pdf from a site. The issue recommended to grab the pdf from here, and store it onto the local computer. Afterwards, attempt to open this pdf in Brave under ‘File > Open File > (select to pdf file)’. The result is a blank page as per the screenshot below.
My first thought to this issue was to apply my professor, David Humphrey’s fix to opening the pdf files in Brave. He posted a case study where he goes through in detail the steps and thought process to fixing the pdf issue he encountered. Unlike the issue I found, his issue involved html files which had pdfs embed in them, with urls that ended with the ‘.pdf’ extension. Unfortunately, after applying his fix removing the 3 lines in urlutil.js, I was still not able to open the pdf files locally.
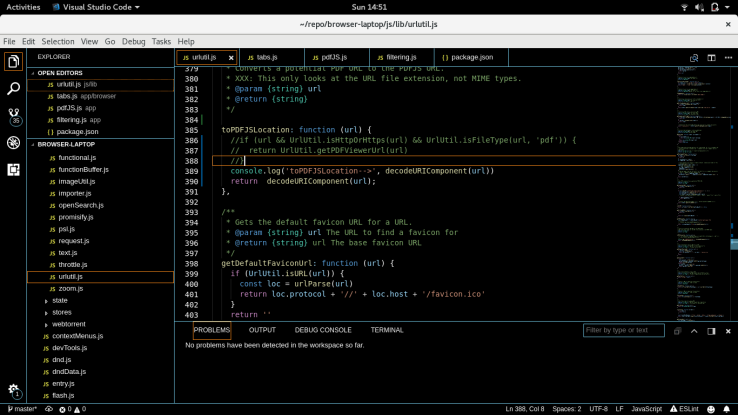
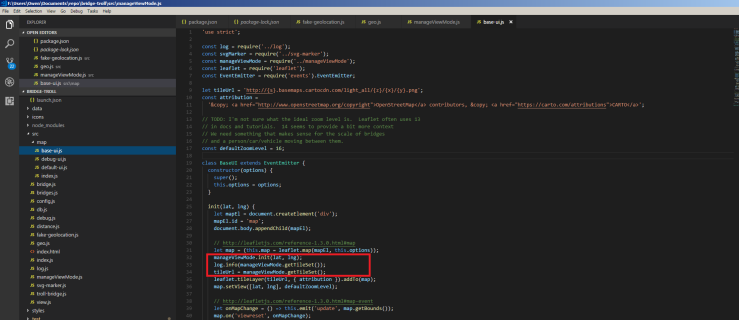
The next thing I looked at was the function in the ‘tab.js’ file called fixDisplayURL(). This function populates the field in a navigationEntry object, and calls getLocationIfPDF() to check if the PDFUrl is a valid and then return the query file Url. This means that the PDFUrl has to start with the the chrome base extension. For example:
Input PDFUrl:
chrome-extension://jdbefljfgobbmcidnmpjamcbhnbphjnb/content/web/viewer.html?file=file%3A%2F%2F%2Fhome%2Fomak%2FDocuments%2Ftest.pdf
returned query Url:
file:///home/omak/Documents/test.pdf
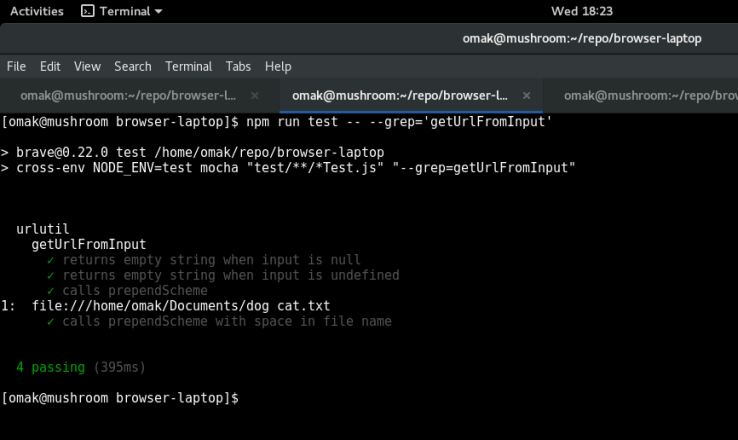
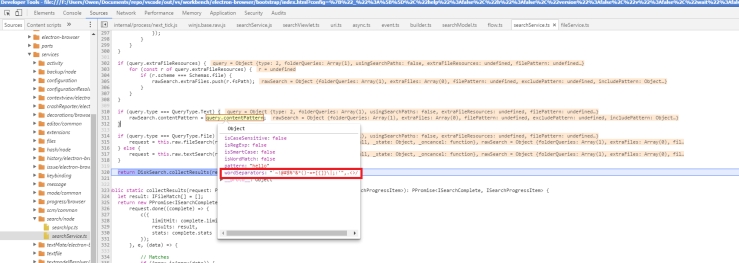
Afterwards, getLocationIfPDf() searches for the string, ‘content/web/viewer.html?file=’ and if it finds this string, it will extract the query following this string, and return it back to fixDisplayUrl(). The following screenshot shows what is passed into getLocationIfPDF(), and the returned url from the function:
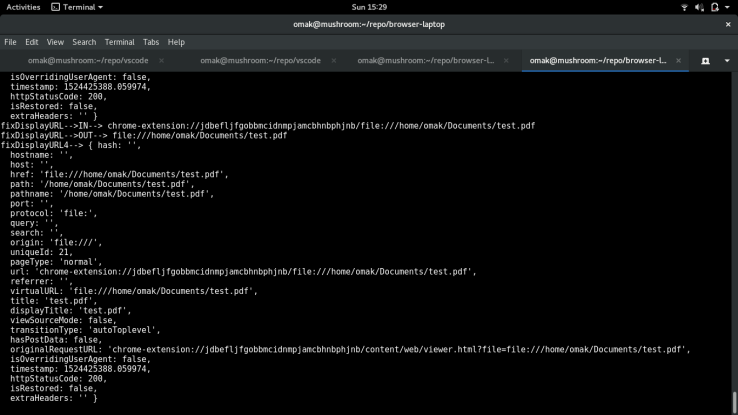
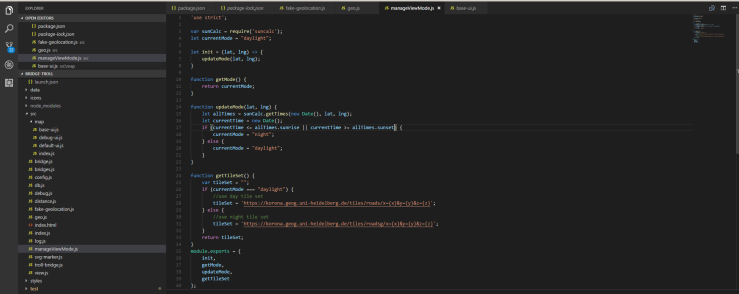
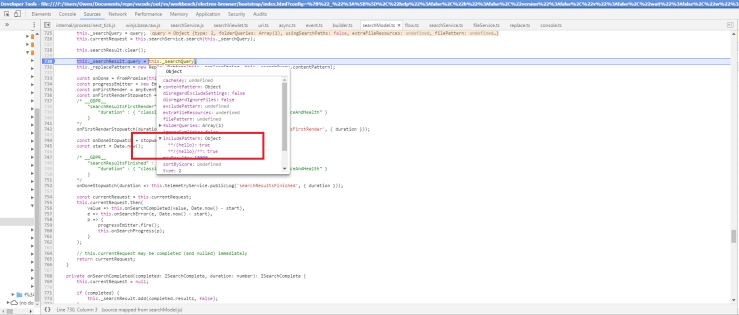
From the results from my log statements, I could not find anything wrong with fixDisplayUrl(), as it seems to be working properly. One of my concern was the ‘origin’ member of the navigationEntry object, as it displayed the url without the ‘content/web/viewer.html?file=’ in it, but after fiddling with the member to ensure the missing part of the string was added, it had no impact on the behaviour of the issue I was facing. The following is a gist of my work on the fixDisplayUrl:
This file contains bidirectional Unicode text that may be interpreted or compiled differently than what appears below. To review, open the file in an editor that reveals hidden Unicode characters.
Learn more about bidirectional Unicode characters
| // hack to deal with about:* pages | |
| const fixDisplayURL = (navigationEntry, controller) => { | |
| if (navigationEntry == null) { | |
| return null | |
| } | |
| navigationEntry = Object.assign({}, navigationEntry) | |
| //console.log("fixDisplayURL–>IN–>", navigationEntry.virtualURL) | |
| navigationEntry.virtualURL = getLocationIfPDF(navigationEntry.virtualURL) | |
| //console.log("fixDisplayURL–>OUT–>", navigationEntry.virtualURL) | |
| if (isTargetAboutUrl(navigationEntry.virtualURL)) { | |
| navigationEntry.virtualURL = getSourceAboutUrl(navigationEntry.virtualURL) | |
| } | |
| if (isIntermediateAboutPage(navigationEntry.virtualURL) && | |
| !navigationEntry.virtualURL.startsWith('about:safebrowsing#')) { | |
| const previousEntry = controller.getEntryAtOffset(-1) | |
| if (!controller.canGoForward() && previousEntry) { | |
| navigationEntry.virtualURL = previousEntry.virtualURL | |
| } | |
| } | |
| if (isTargetMagnetUrl(navigationEntry.virtualURL)) { | |
| navigationEntry.virtualURL = getSourceMagnetUrl(navigationEntry.virtualURL) | |
| } | |
| if (navigationEntry.virtualURL === 'about:newtab') { | |
| navigationEntry.virtualURL = '' | |
| } | |
| navigationEntry.virtualURL = muon.url.formatForDisplay(navigationEntry.virtualURL) | |
| //console.log("fixDisplayURL2–>", navigationEntry) | |
| const parsedURL = muon.url.parse(navigationEntry.virtualURL) | |
| //console.log("fixDisplayURL3–>", parsedURL) | |
| navigationEntry = Object.assign(parsedURL, navigationEntry) | |
| if(navigationEntry.url.startsWith('chrome-extension://jdbefljfgobbmcidnmpjamcbhnbphjnb')){ | |
| //navigationEntry.url = 'chrome-extension://jdbefljfgobbmcidnmpjamcbhnbphjnb/content/web/viewer.html?file=' + navigationEntry.virtualURL | |
| //navigationEntry.path = '/test.pdf'; | |
| //navigationEntry.pathname = '/test.pdf'; | |
| //navigationEntry.origin = navigationEntry.virtualURL; | |
| } | |
| //console.log("fixDisplayURL4–>", navigationEntry) | |
| return navigationEntry | |
| } |
After an hour or two fiddling with both the getLocationIfPDF() function and the fixDisplayUrl() function, I shifted my focus towards the file pdfJS.js. There are 3 functions of note:
- onBeforeRequest()
- onHeadersReceived()
- isPDFFile()
- isPDFDownloadable()
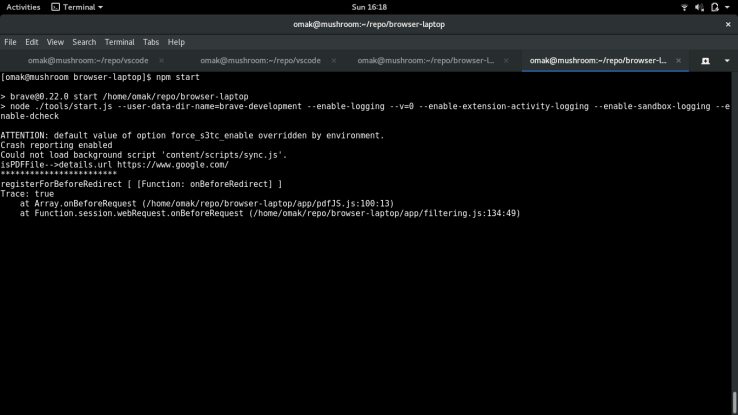
One of the first things I wanted to find out was the different between loading a pdf from a URL and loading a pdf from a local file path. The first thing I found out was that with a url path such as ‘http://www.orimi.com/pdf-test.pdf’, onBeforeRequest() is called and processed, afterwards onHeadersReceived() is fired and checks if it uses isPDFFile() and isPDFDownloadable() to check and retrieve the pdf file. It will look for things such as the ‘Content-type:’ being ‘application/pdf’ before rendering the pdf file. However, when I pass in a local file path such as ‘file:///home/omak/Documents/test.pdf’, only the onBeforeRequest() function is triggered.
The onHeadersReceived() function is never called when opening a local file. This is likely caused by the line: appActions.loadURLRequested(details.tabId, getViewerUrl(details.url))
This line opens the Url that is passed into the function, and the browser will render that url. From my testing, it never returns from this call. This means the subsequent lines such as ‘return result’ are never executed, and onHeadersReceived() is never called. UPDATE: Upon further testing, my hypothesis was not correct, and the subsequent lines were called, but onHeadersReceived() was still not triggered.
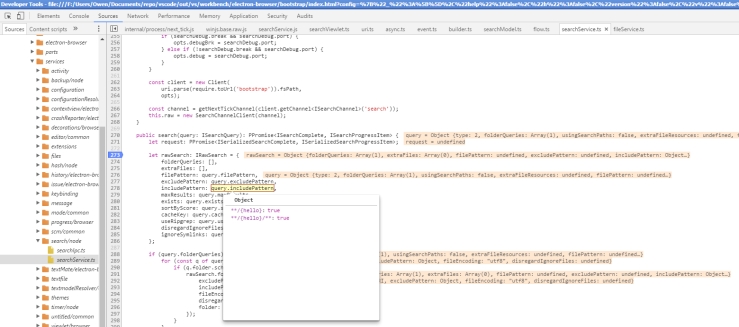
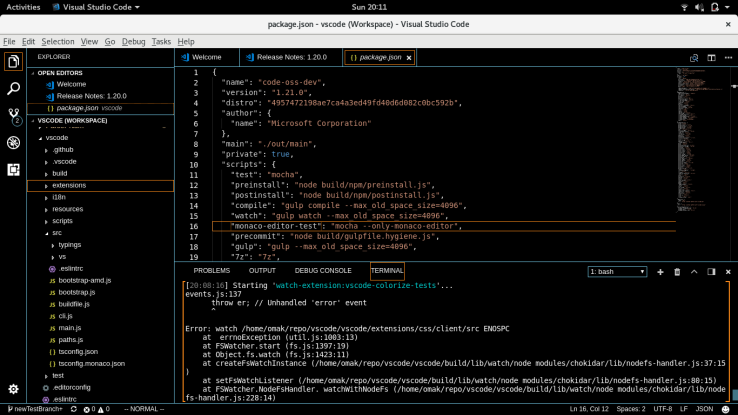
To investigate this matter further, my professor suggested that I use the ‘console.trace()’ command to see if I figure out the call stacks for onBeforeRequest(). This led me to the filtering.js, which calls onBeforeRequest(), and stores the results in an array used for registering headers later on.
This led me to explore the filtering.js file, which was filled with unfamiliar code that dealt with handling appStates, appActions, and muonCb, all of which I could not understand. In particular, I wanted to find out what happens when ‘result.cancel’ is set to be true, which was the case for opening a local pdf file. Within filtering.js, there is a section of code that dealt of this case, but I couldn’t figure what it was doing in its entirety.
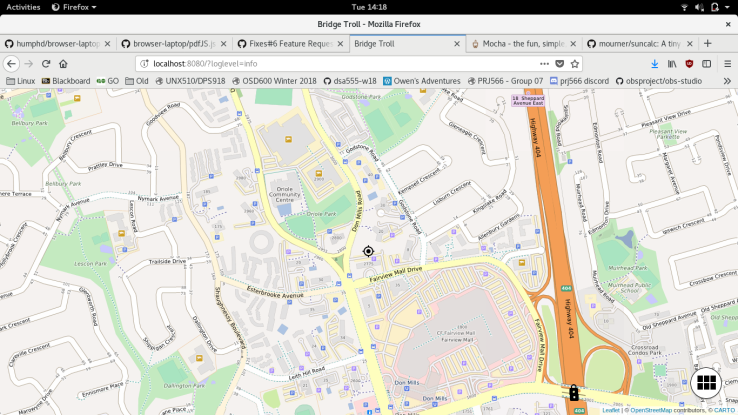
From further testing where I commented out the ‘result.cancel = true’ line in pdfJS.js, the behaviour for opening a local file is that the browser will prompt to re-download this file. The behaviour will be shown on the screenshot below.
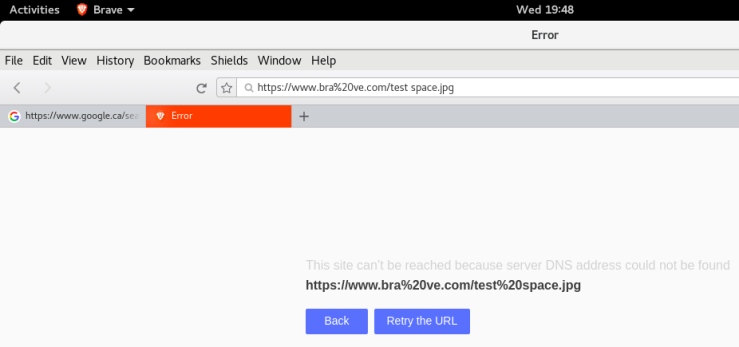
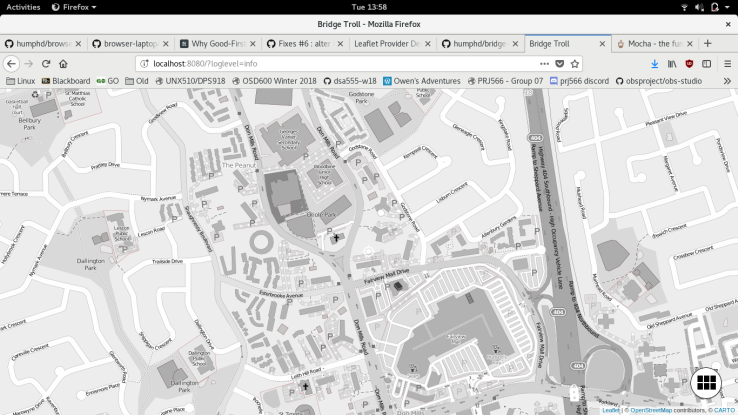
However, if I only commented out the ‘appActions.loadURLRequested(details.tabId, getViewerUrl(details.url))’ line here, the resulting behaviour is that nothing happens, and I only receieve error page.
After all of the above attempts, I thought it would be best if I search for another bug to fix instead, since I could not go much further. Since I was not able to go further, I am posting my work here within this branch of my fork in hopes that I can maybe solve this another time.
I switched back to bug hunting in the VSCode project instead and found some issues I could handle.
Issue 3:
Since I’ve burned a lot of my allotted time on my second attempt, I decided to find something smaller to fix this time around. My classmate, Matthew Quan, suggested that a previous issue mentioned in class earlier in the semester was still not fixed. The issue is located here: https://github.com/Microsoft/vscode/issues/42726.
The problem was in vscode and how it searches absolute paths via the quick open (ctrl+P) command. If one of the directories names or file names included a ‘space’ in the string, quick open would not be able to open that file. Back in February, our professor had created a solution to this problem, and posted this walkthrough. He would check for a path separator in the file path, and then remove in the file path if it contained a path separator. He was about to submit a PR for the issue until another classmate managed to submit before he could. However, the solution posted was incomplete, and users on mac later reported the issues still existed, and the issue reopened. The developer from vscode attempted to make his own fix as well, but that did not work either.
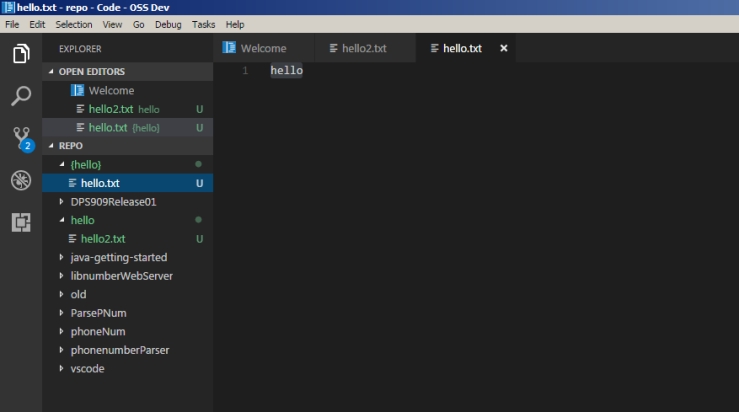
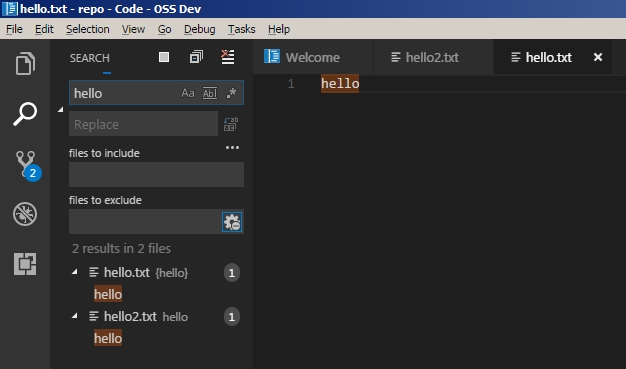
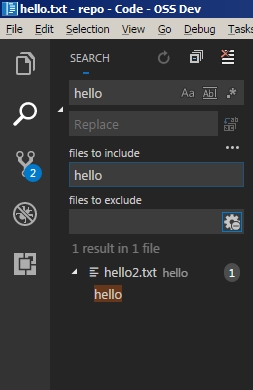
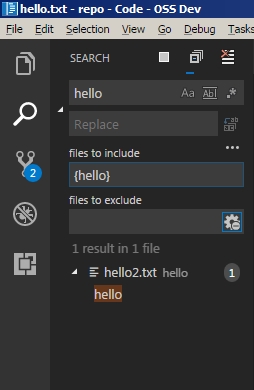
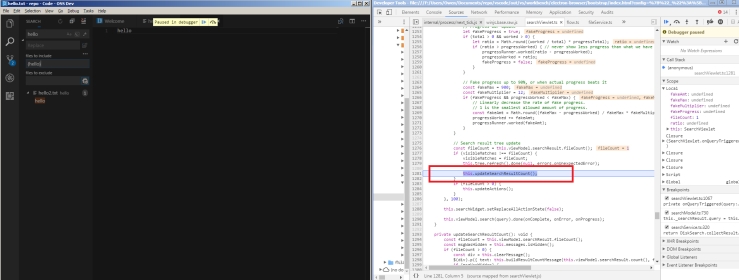
To solve this issue, I continued where the walkthrough left off. The first thing I did was to ensure the issue still existed, by quickly replicating the problem again. I created an empty file with a space in the file name and attempted to open it through vscode.
From the screenshots above, we know the problem still existed. The next thing I did was to explore what the developer had done recently to fix the problem. It was posted in the comments, and his changes are here. His fix was to remove all occurrence of white space from the file path using the following regex:
stripWildcards(original).replace(/\s/g, '');
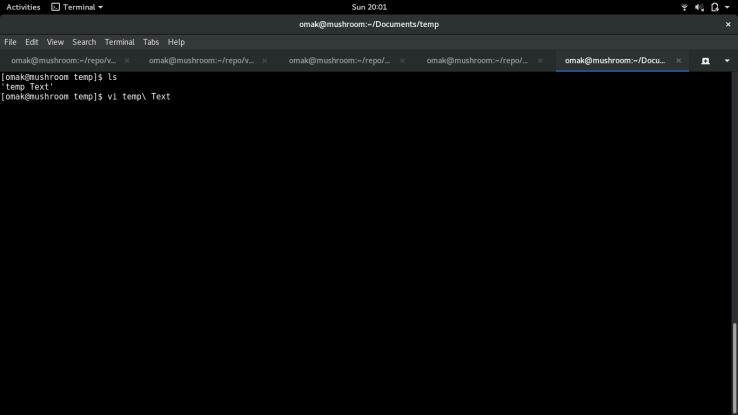
If the space was removed in the file name, then quick open would not be able to open that file since it cannot match the file name. My first thought to going around this problem was to look at how my fedora handles file names with spaces in the terminal. I used the ‘tab’ function in the terminal to autocomplete my file name ‘temp Text’ and here are the results:
The other solution would be to have single quote (‘) or double quotes (“) around the file name in order to allow for spaces in the file name. With this in mind, I decided to use this behaviour for pushing through the file names.
I changed the regular expression to the following at first:
stripWildcards(original).replace(/\s/g, '\ ');
However, this fix failed the test case of:
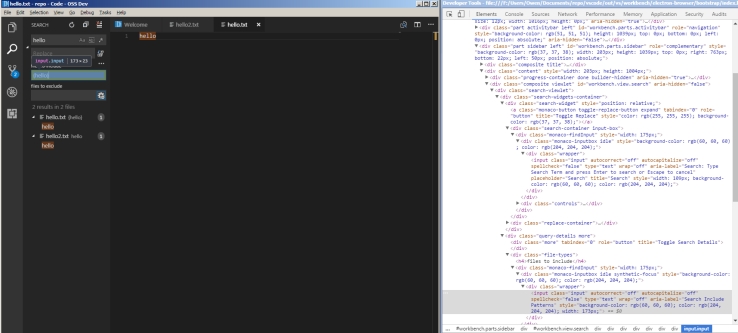
assert.equal(scorer.prepareQuery(' f*a ').value, 'fa');stripWildcards(original).trim().replace(/\s/g, '\ ');From the screenshots, it would seem that my fix worked. The next thing I did was to run the test cases in quickOpenScorer.test.ts. From running the tests, I failed the following two tests:
assert.equal(scorer.prepareQuery('model Tester.ts').value, 'modelTester.ts');
assert.equal(scorer.prepareQuery('Model Tester.ts').lowercase, 'modeltester.ts');
After much deliberation, I decided it was best to change the two test cases, as it does not reflect what the function is trying to do. It was not a hasty decision to make, as I am sure there may be underlying reasons as to why the test cases were written this way to begin with. However, based on the documentation above the function:
Helper function to prepare a search value for scoring in quick open by removing unwanted characters.
I concluded that the spaces in between the filenames were NOT unwanted characters, and that they should be kept so that files could be found. For that reason, I updated the test cases to the following:
assert.equal(scorer.prepareQuery('model Tester.ts').value, 'model Tester.ts');
assert.equal(scorer.prepareQuery('Model Tester.ts').lowercase, 'model tester.ts');
In addition, I added more test cases to ensure the tests I made would be checked for breakage in the future. In the end, the following is the updated test function:
This file contains bidirectional Unicode text that may be interpreted or compiled differently than what appears below. To review, open the file in an editor that reveals hidden Unicode characters.
Learn more about bidirectional Unicode characters
| test('prepareSearchForScoring', function () { | |
| assert.equal(scorer.prepareQuery(' f*a ').value, 'fa'); | |
| assert.equal(scorer.prepareQuery('model Tester.ts').value, 'model Tester.ts'); | |
| assert.equal(scorer.prepareQuery('Model Tester.ts').lowercase, 'model tester.ts'); | |
| assert.equal(scorer.prepareQuery('ModelTester.ts').containsPathSeparator, false); | |
| assert.equal(scorer.prepareQuery('Model' + nativeSep + 'Tester.ts').containsPathSeparator, true); | |
| assert.equal(scorer.prepareQuery('dir' + nativeSep + 'tester.ts').value, 'dir' + nativeSep + 'tester.ts'); | |
| assert.equal(scorer.prepareQuery('dir' + nativeSep + 'model tester.ts').value, 'dir' + nativeSep + 'model tester.ts'); | |
| }); |
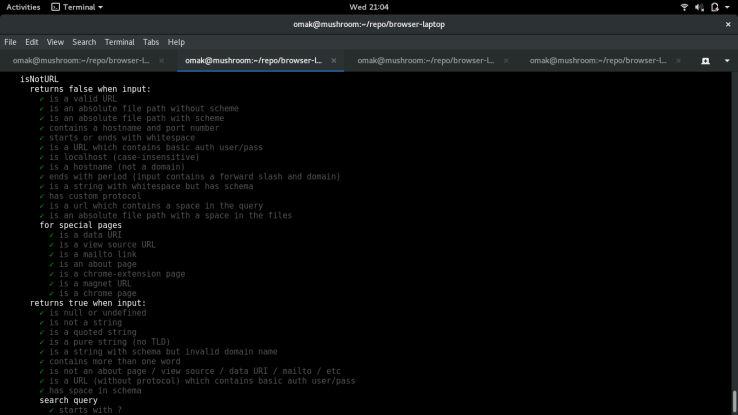
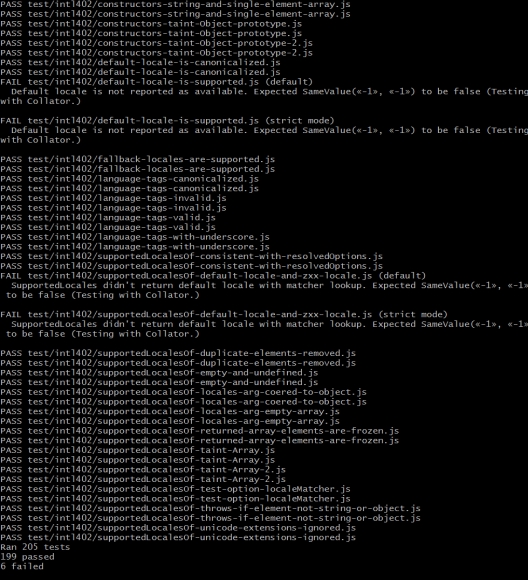
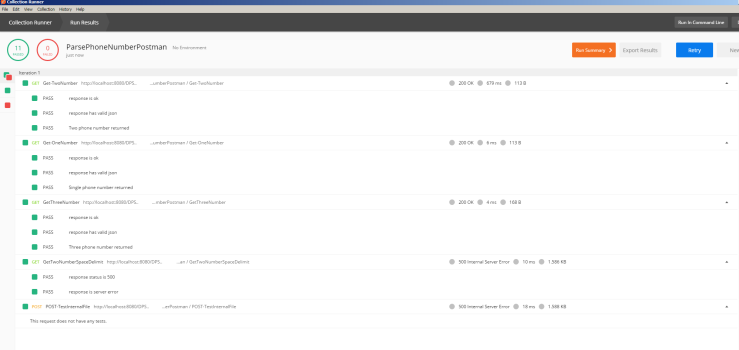
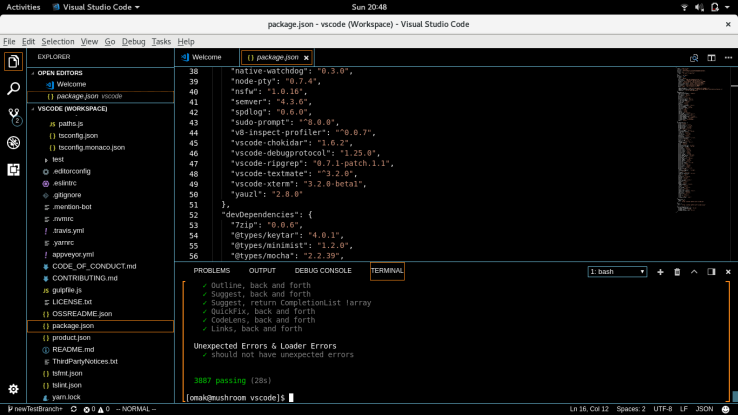
The test cases test for file paths with their native separators and ensures the spaces in between the file names are retained. Before I finished and pushed my changes onto my origin repo, I ran the test suite once more to ensure everything was running correctly. Here are the results:
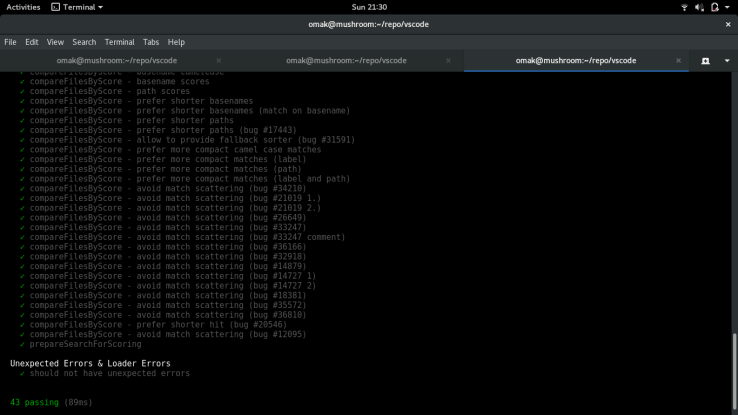
With all the test cases passed, I proceeded to push to origin and submit the PR. Here’s the link to the final results.
Issue 4:
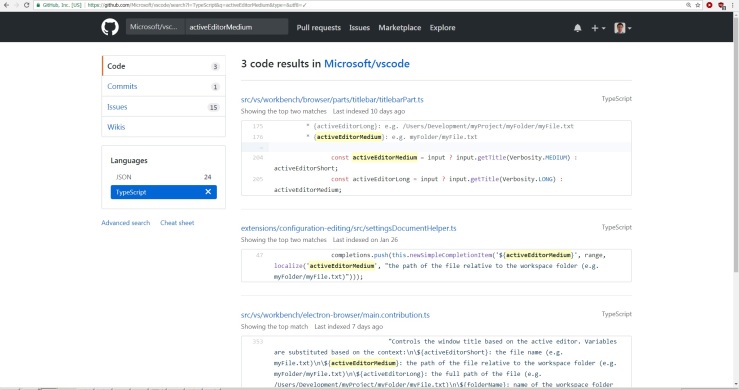
The fourth issue is also from VSCode, and it also involved regular expressions with file paths. This time it involved url paths and how VSCode adds a ‘/’ to the file path depending on the situation. The issue is linked here, and it has been there for awhile since last September 2017. The reporter links the test cases that passed and failed in the initial post, and there are additional test cases added below the initial comment.
This bug has more to do with how different operating systems handle file paths rather than a broken functionality issue. In it, the contributor and members of the community discussed back and forth about how strict and lax the regular expression should be. One of the first things I did this time around was to read this conversation to ensure that there isn’t already a solution to this issue. I also followed the additional test cases they were testing for to ensure my fix would pass those tests as well.
One of the tools I used to test my regex was the following: https://regex101.com/
It allowed me to test my regex to see the strings that are matched and the ones that are discarded.
Since the issue involved relative paths, and determining when to add the extra slashes, I decided to leave the logic for the windows platform cases intact and focus on non-Window test cases. Instead, I added a regex:
const _isRelative = /^([~\.]\/|^[a-zA-Z]+\/)/;
This is to determine if we are using a relative path, based on the test cases provided. It would look for either a ‘./’ , ‘~/’ , or any number of the alphabet followed by a ‘/’ to determine that the file path is relative. Afterwards, we would only add a additional ‘/’ to the beginning of the filepath if it is NOT a relative path.
However, my original fix failed to the test case linked here. The test case is for a non-Windows path with the string, ‘./c/win/path‘. The expectation is that we do not add a ‘/’ to the beginning of this path. After some exploration with the makeFsPath() function, I was able to pinpoint the spot to do an additional check for strings that start with the ‘.’, and ensure it does not append the extra slash.
Lastly, I added the additional tests to the suite as per follows:
This file contains bidirectional Unicode text that may be interpreted or compiled differently than what appears below. To review, open the file in an editor that reveals hidden Unicode characters.
Learn more about bidirectional Unicode characters
| if (!isWindows) { | |
| test('absolute path', function () { | |
| const path = '/foo/bar'; | |
| assert.equal(URI.file(path).path, path); | |
| }); | |
| test('relative path', function () { | |
| const path = 'foo/bar'; | |
| assert.equal(URI.file(path).path, path); | |
| const fileUri1 = URI.parse(`file:foo/bar`); | |
| assert.equal(fileUri1.path, 'foo/bar'); | |
| const uri = fileUri1.toString(); | |
| assert.equal(uri, 'file://foo/bar'); | |
| const fileUri2 = URI.parse(uri); | |
| assert.equal(fileUri2.path, '/bar'); | |
| assert.equal(fileUri2.authority, 'foo'); | |
| }); | |
| test('relative path with dot', function () { | |
| const path = './foo/bar'; | |
| assert.equal(URI.file(path).path, path); | |
| }); | |
| } |
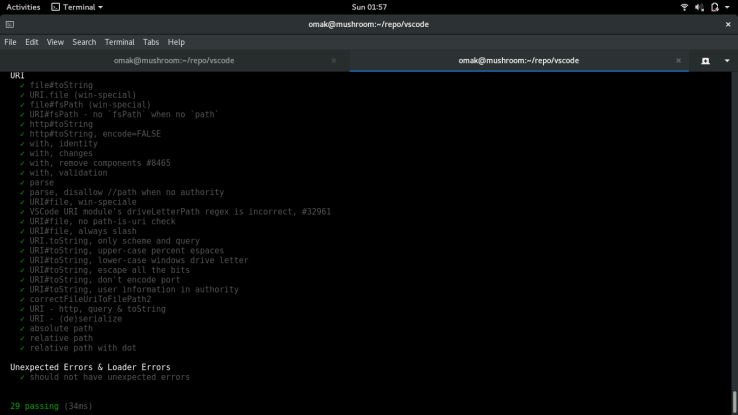
I ran the testers again to make sure everything in that suite is successfully passed prior to submitting the PR.
This is my PR submission here.
Unfortunately, I made a mistake when pushing the commits by including my previous issue’s commits in this PR. I would like to find a way to remove those unnecessary commits if possible.
Learning experience and some thoughts:
By looking at the actual code in VSCode, and Brave browser-laptop, I would have to say the documentation in VSCode is more thorough and detailed. I think this was one of the reasons why I could not follow Brave’s code once it got to filtering.js file. The other reason I was not able to continue with the Brave issue was that I could not get the Brave debugger working for my Fedora machine. It made me quite envious of how my prof was able to launch the Brave debugger from VSCode.
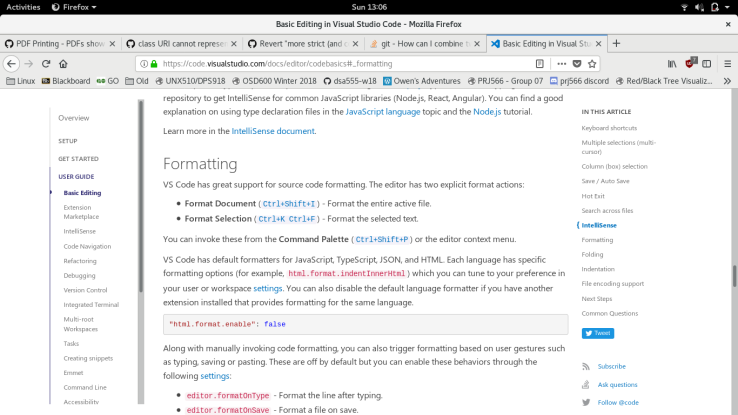
One of the issues that cost me a bit of time in VSCode was apparently formatting the code before being able to push the commits onto GitHub. I tried many things such as running ‘gulp tslint’ which timed out after 46 seconds. I also tried the tslint extension in VSCode, but that did not do the trick either. Finally, I found the solution here:
Lastly, thank you for reading this very long blog post. I hope to fix more bugs in the future.