Today, I had my first encounter with building open source software from Github. The task was to clone the latest version of Visual Code by Microsoft and try to rebuild this software from its source code.
Visual code is an open source code editor that aims to allow developers to build web applications. The editor has its own marketplace for extensions which allows the editor to support a myriad of languages. Some of the extensions I installed right away were the “Java Extension Pack”, “Vim” and “Debugger for Firefox”. I’ve been using Java since last semester, so I thought it’d nice to run some of my existing code inside vscode. Since the start of my studies at Seneca, I’ve also been using vim to do a lot of my coding as well.
If you would like to try out building your own vscode, the repository for the vscode project can be found here.
My laptop is currently runs on Fedora 25, which is a Linux distribution, so the instructions below are only applicable for Fedora platforms. All of the commands below are run inside the vscode folder which you get after you clone the repository mentioned above. To build vscode from its source, there are 4 other software you need to setup first:
-
-
- Yarn
Yarn is a package builder that caches the dependencies you used to build your project. It can easily be installed with:
sudo dnf install yarn
For other systems, you can use go here for instructions on how to get yarn running on your machine. - Node.js
Node.js was slightly more difficult as I already had an old version of node on my machine. This meant I had to upgrade my mode from version 6.1.4 to 9.4.0 using the command:
sudo dnf -y install nodejs --best --allowerasing
I used the guide here to help me install node.js. - Python
To install python, I used:
sudo dnf install pythonPlease bare in mind that this will only install Python 2.7, which was what I needed since vscode does not support Python 3 as of the time of this writing.
Afterwards, I also installed python’s package management system using this command:
python get-pip.py - Native-keymap
This is a node module to support different keyboard layouts, especially since Mac keyboards have the command key, while the rest of the world has a windows key on their keyboard. To install this module, I used:
sudo dnf install libx11-devel.x86_64 libxkbfile-devel.x86_64
To find out more about Native-keymap, go here.
- Yarn
-
After installing the 4 key software above, I was ready to compile the vscode for the first time. This is done with the command:
yarn run watch
My first attempt at running this command resulted in an error as per the screenshot below:
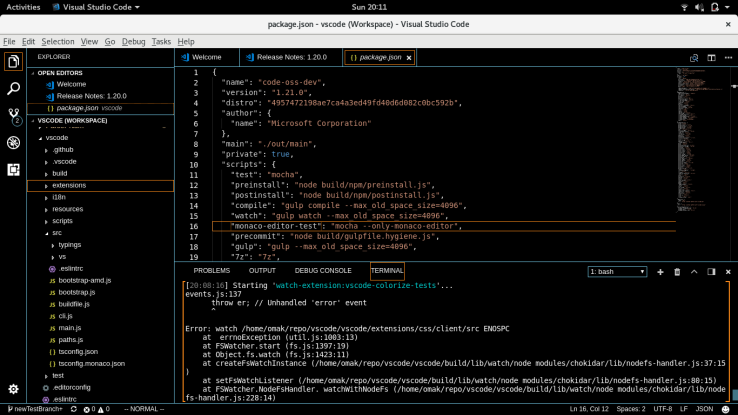
This problem was caused by the vscode file watcher running out of handles. To fix it, I had to increased the number of handles available by editing /etc/sysctl.conf and adding the following line to the end of the file:
fs.inotify.max_user_watches=524288
This solution was found here.
After applying the fix, I managed to compile the code without errors (though the compilation took a minute or two). Next, I attempted to test the code with the following command:
./scripts/test.sh
Fortunately, the tests ran perfectly fine for me as per the screenshot below.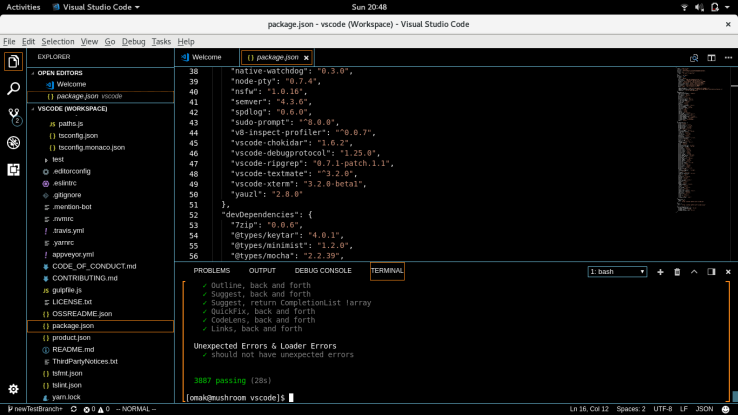
Next, I ran the command to build vscode:
./scripts/code.sh
and voila!
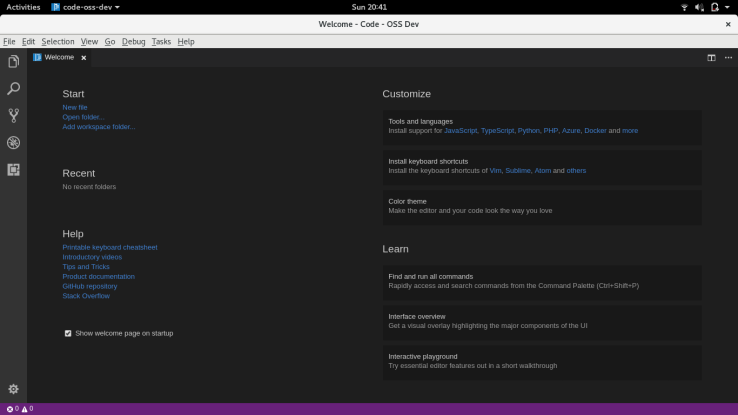
The vscode OSS Dev was successfully built. This concludes my First Encounter in building open source software.
Owen
